Alfred Poppins
Stove Fitting
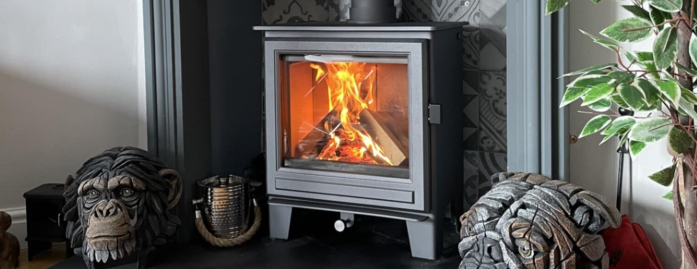
There’s nothing quite like the warmth and comfort of a real fire. A wood-burning or multi-fuel stove doesn’t just heat your home efficiently—it becomes a stunning focal point too.
But before you can enjoy cosy evenings by the fire, your stove needs to be installed correctly and safely. At Alfred Poppins Stoves, we’re HETAS-registered installers, so we thought we’d share what goes into a proper stove installation.

Here’s our step-by-step guide:
1. Initial Assessment & Planning Every installation starts with a survey: We check the fireplace or installation area. Inspect the chimney or flue for safety and condition. Measure the hearth and opening to ensure everything complies. Work out the right stove size and heat output (kW rating) for your room. We also make sure your installation meets Building Regulations Document J. Don’t worry—planning permission usually isn’t needed unless you’re in a listed property or conservation area.
2. Preparing the Hearth & Surround Your stove must sit on a non-combustible hearth. Regulations say it should extend at least: 150mm either side of the stove. 300mm in front of the stove door. Depending on the stove, the hearth needs to be 12mm or 125mm+ thick. We’ll also check the surrounding walls and fit protective panels if clearances are tight.
3. Chimney & Flue Work This is one of the most important steps: We sweep the chimney to remove soot and tar. A stainless steel liner (316 or 904 grade) is usually fitted for safety and efficiency. At the base, we’ll fit a register plate (if no liner is used) to keep the chimney sealed. At the top, we fit a cowl or rain cap to improve the draw and stop rain, birds, and debris getting in.
4. Fitting the Stove Once the groundwork is done, it’s time for the exciting part: The stove is positioned safely on the hearth. The stove pipe is connected securely to the chimney liner or register plate. All joints are sealed with high-temperature cement or silicone.
5. Ventilation For stoves over 5kW, an air vent is needed to bring in fresh air. This ensures the stove burns properly and efficiently.
6. Testing & Commissioning Before we hand everything over, we carry out a full safety check: A smoke test to make sure the flue is drawing correctly. All joints and seals are checked for leaks. A carbon monoxide alarm is fitted within 1–3 metres of the stove (this is a legal requirement).
Finally, you’ll receive: Your HETAS certificate or Building Control sign-off. The user manual and warranty documents. A full commissioning checklist. Safety First Installing a stove is not a DIY job. Poor installation can lead to chimney fires, carbon monoxide leaks, and even invalidate your home insurance. That’s why it’s always best to use a qualified installer like Alfred Poppins Stoves.
Ready to transform your home with a wood-burning or multi-fuel stove? Contact us today for expert advice and a professional installation service.


